My Other blog

Vote

Free Brushes

Showing posts with label Creative Scraps By Crys CT. Show all posts
Showing posts with label Creative Scraps By Crys CT. Show all posts
Monday, 31 August 2020

-: Supplies Needed:-
Kit used :- Waiting For Autumn TS by Creative Scraps By Crys HERE
Tube of choice.
♥
Info
C/P + Copy and paste
Resize (click image - resize)
Add d/s = Add drop shadow
♥
Lets Get Started
♥
Open WFA_Element_56
C/P and position to the top left
Duplicate
Mirror - Flip
Layers - merge - merge down
♥
Open WFA_Element_39
C/P and position to the top right
Duplicate
Mirror - Flip
Layers - merge - merge down
♥
Make a new raster layer
♥
Open WFA_Frame_4
Using your selection tool on point to point draw round the frame
Select the raster layer you just made
C/P WFA_Paper_8 into selection
Select none
Select frame
Add a d/s
♥
Open WFA_Element_59
C/P into your image
Position to the bottom left of your frame
Add a d/s
♥
Open WFA_Element_19
C/P into your image
Resize 70%
Position towards the lower middle of your frame
Add a d/s
♥
Open WFA_Element_9
C/P into your image
Resize 50%
Position between the two elements you just placed
Add a d/s
♥
Add your tube.
If you are using the same tube as me resize it by 60%
position to the right of your image
Add a d/s
♥
Open WFA_Element_49
C/p Into your image
Position slightly lower
♥
Open WFA_Element_15
C/P into your image
Resize 50%
Position on the top left of your frame
Add a d/s
♥
Open WFA_Element_67
C/P into your image
Resize 30%
Position towards the middle of your image
Duplicate - Mirror
Position to the top right of your frame
Layers - merge - merge down
Add a d/s
♥
Add copyrights
Add your name
Save as PNG
♥
Tutorial written on the 31st August 2020 by Emma
Please do not rip or claim as your own.
If you wish to show me your results please email me here

Monday, 10 August 2020

:-Supplies Needed:-
PTU Scrap kit :- No longer available
Mask by me :- https://tinyurl.com/y24uy74w
Tube :- An exclusive by Alehandra Vanhek at PFD.
You can view the tube https://tinyurl.com/y3tuvrss
Font of choice
♥
Info
C/P + Copy and paste
Resize (click image - resize)
Add D/S = Add drop shadow
♥
Lets Get Started:-
Lets get started
↓
Open your mask and minimise for now
♥
Open a new transparent image 800 X 800 pixels
(don't worry you can resize at the end if you want)
♥
Selections - select all
Open Paper2
C/P into selection (right click, choose paste into selection)
Select none
Blur - Gaussian Blur - radius 17
Layers - new mask layer - choose mask from drop down layer
Layers - merge - merge group
♥
Open Tree
C/P into your image
Move to the left and up slightly
Duplicate - mirror
Move slightly down
Add drop shadow to both
♥
Open Fan
C/P as a new layer
Add a d/s
♥
Open Spray3
C/P as a new layer
Move to the left
Duplicate - mirror
♥
Open Statue
C/P as a new layer
Resize 80%
Move to right and up slightly
Add a d/s
♥
Open Pyramid
C/P as a new layer
Resize 60%
Move to the left and down slightly
Add a d/s
♥
Open Leaves
C/P as a new layer
Resize 60%
Move in front of the pyramid
Add a d/s
♥
Open Cat1
C/P as a new layer
Resize 40%
Move to the right in front of the statue
Add a d/s
♥
Add your tube.
Resize as needed
Add a d/s
♥
Open Coins
C/P as a new layer
Resize 20%
Duplicate quite a few times. Mirror some and position them where you like
Add a d/s
♥
Resize if needed
Add copyrights and your name
Save as PNG
♥
Add copyrights and your name
Save as PNG
Tutorial written on 10th August 2020 by Emma
Please do not rip or claim as your own.
Please do not rip or claim as your own.
If you wish to show me your results please email me here
Saturday, 8 August 2020
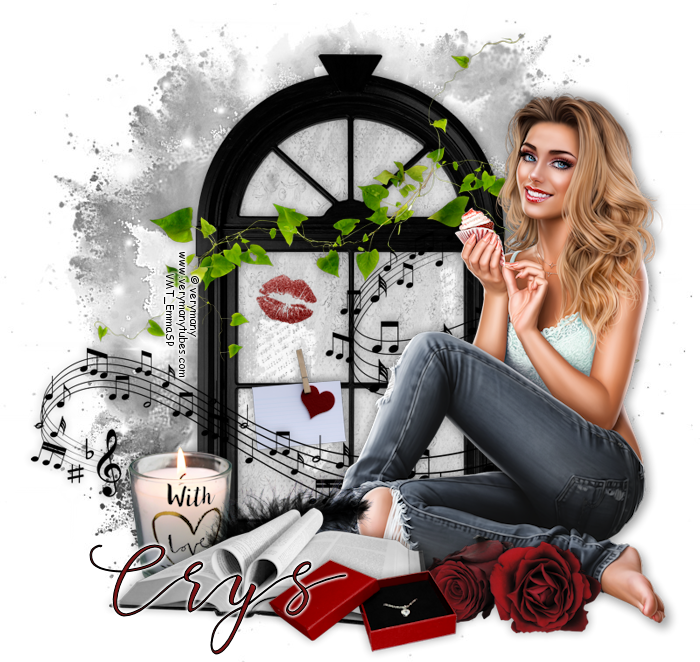
.·:* Creative Scraps by Crys CT *:·.
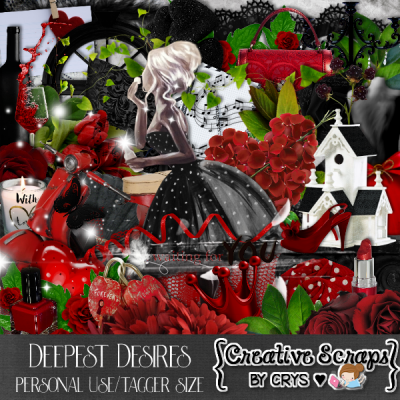
PTU Deepest Desires - Tag
To purchase the kit go to -> https://tinyurl.com/yxwl9osu
On sale for $1
Friday, 7 June 2019

:- Supplies Needed -:
PTU Scrap Kit by Creative Scraps By Crys - ScrapCrys_IB-EliasChatzoudis-139-4 https://tinyurl.com/y52242dd
Mask by Mizteeques - Miz_Mask_264 http://mizteequesmasks.blogspot.com
Tube from Elias Chatzoudis T CDO https://tinyurl.com/yxkasqmv
♥
Info
C/P + Copy and paste
Resize (click image - resize)
Add D/S = Add drop shadow
♥
Lets Get Started:-
↓
Open your mask and minimise for now
♥
Open a new transparent image 800 X 800 pixels
(don't worry you can resize at the end if you want)
♥
Selections - select all
Open Paper2
C/P into selection (right click, choose paste into selection)
Select none
Layers - new mask layer - choose mask from drop down layer
Layers - merge - merge group
♥
Open Sparkles
C/P into your image
Move towards the upper right
Duplicate - mirror - flip
♥
Open GlitterSpray
C/P into your image
Add a d/s
♥
Open Wand
C/P into your image
resize 40%
Move to the upper right by the sparkles
♥
Open a new transparent layer
Open frame
C/P into your image
Resize 60%
Using your selection tool select inside the frame
Selection - modify - expand - 3 pixels
Highlight the transparent layer you made
Open Paper 4, C/P into selection
Selections - select none
Select the frame
Add a d/s
♥
Open Pearls
C/P into your image
Add a d/s
♥
Open Castle
C/P into your image
Resize 50%
Move to the bottom left of your image
Add a d/s
♥
Open Stars
C/P into your image
Move to the top of your frame
Add a d/s
♥
Open Pillow
Resize 50%
Move down by the castleAdd a d/s
♥
Open glass slipper
C/P into your image
Resize 20%
Position on top of the pillow
Add a d/s
♥
Paste your tube
Resize if needed (the Elias tube you don't need to resize)
Position to the bottom of the frame
Add a d/s
♥
Open WordArt
C/P into your image
Resize 50%
Position to the top left of the frame
♥
Open Crown
Resize 30% - Mirror
Position to the top right of the frame
Add a d/s
♥
Open Mouse
Copy and paste into your image
Resize 20%
Position on the knee of your tube
Duplicate - Mirror
Position down by the foot of your tube
Add a d/s on both layers
♥
Add all copyrights and your name
Save as PNG
♥
Tutorial written on 7/06/2019 by Emma
Please do not rip or claim as your own.
Please do not rip or claim as your own.
If you wish to show me your results please email me here


Wednesday, 5 June 2019


:- Supplies Needed -:
PTU Scrap Kit by Creative Scraps By Crys ScrapCrys_IB-JasmineBecket-Griffith-132-1
Mask by Mizteeques Miz_Mask 067 http://mizteequesmasks.blogspot.com
Tube of choice. I am using the tube that inspired this kit Jasmine Becket-Griffth 132-1
♥
Info
C/P + Copy and paste
Resize (click image - resize)
Add D/S = Add drop shadow
♥
Lets Get Started:-
↓
Open your mask and minimise for now
♥
Open a new transparent image 800 X 800 pixels
(don't worry you can resize at the end if you want)
♥
Selections - select all
Open Paper 5
C/P into selection (right click, choose paste into selection)
Select none
Layers - new mask layer - choose mask from drop down layer
Layers - merge - merge group
♥
Open scatter 2
Position to the top left
Duplicate - mirror - flip
merge down
♥
Open a new transparent layer
Open frame 2
C/P into your image
Resize 80%
Using your selection tool select inside the frame
Selection - modify - expand - 3 pixels
Highlight the transparent layer you made
Open Paper 2, C/P into selection
Selections - select none
Select the frame
Add a d/s
♥
Open Moon
C/P into your image
Resize 40%
♥
Open cloud 2
C/P into your image
Position to the right of your frame
Add a d/s
♥
Open cloud
C/P into your image
Position to the left of your frame
Add a d/s
♥
Open your tube
C/P into your image
Position slightly to the left on the cloud
Add a d/s
♥
Open cloud again
C/P into your image
Resize 50%
Position just to the right of your tube
Add a d/s
♥
Open book
C/P into your image
Resize 50%
Place by your tube
(see mine for placement)
♥
Open WordArt
C/P into your image
Resize 70%
Position to the left
Add a d/s
♥
Open scatter
C/p into your image
Position over the cloud on the right hand side
♥
Open Star2
C/P into your image
Resize 20%
Duplicate a few times and place where you like
♥
Forum Sig
Open a new canvas size 620 wide by 250 high
Flood fill with black
Copy the mask layer from your main tag
Paste as a new layer into your image
Move over to the left
Duplicate - mirror
♥
Open Scatter
C/P into your image
Move to the left
Duplicate - mirror
Add a d/s
♥
Open Cloud2
C/P into your image
Move over to the right
Add a d/s
♥
Open Cloud
C/P into your image
Resize 50%
Position to the left
Add a d/s
♥
Open Moon
C/P into your image
Resize 40%
♥
Copy and paste your tube
Resize 70%
Position to the right
Add a d/s
♥
Open WordArt
C/P into your image
Resize 50%
Position to the left
♥
Open a new layer
Selections - select all
Selections - modify - contract - 5 pixels
Selections - invert
Open Paper 2
Paste into selection
Select none.
♥
Avatar
Shift D on your forum sig
Image - canvas size
Choose size 200 x 200
Canvas size 200
Choose left, middle or right. I went left
♥
Resize the WordArt to 60%
Position towards the bottom
♥
Open a new layer
Selections - select all
Selections - modify - contract - 5 pixels
Selections - invert
Open Paper 2
Paste into selection
Select none.
♥
Add copyrights and name on all 3 images.
Save as PNG
Tutorial written on 5/06/2019 by Emma
Please do not rip or claim as your own.
Please do not rip or claim as your own.
If you wish to show me your results please email me here
Monday, 7 January 2019

-: Supplies Needed :-
PTU Scrapkit - A Passion for reading by Crys. You can purchase it HERE
Mask - DBV Masks 119 http://designsbyvaybs.blogspot.com/2010/06/masks-114-125.html
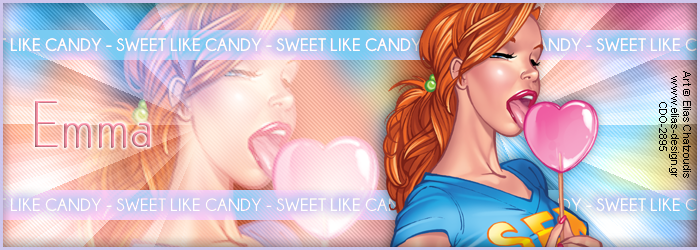
Tube - PinUp Toons tube https://www.cdoestore.com
♥
Info
C/P + Copy and paste
Resize (click image - resize)
Add D/S = Add drop shadow
♥
Lets get started
↓
Open your mask and minimise for now
♥
Open a new transparent image 800 X 800 pixels
(don't worry you can resize at the end if you want)
♥
Selections - select all
Open APFR_Paper_1
C/P into selection (right click, choose paste into selection)
Select none
Layers - new mask layer - choose mask from drop down layer
Layers - merge - merge group
♥
Open a new transparant layer
Open APFR_Frame_1
C/P into as a new layer
Resize 70%
♥
Open APFR_Element_20
C/P into your image
Resize 30%
Position to the top right of the frame
Duplicate - mirror
Position slightly higer on the left side of the frame
Add a d/s to both
♥
Select the frame layer
Use your magic wand and select the inside of your frame.
Select the transparant layer
Open APFR_Paper_6
C/P into selections.
Select - none.
♥
Open APFR_Element_24
C/P as a new layer
Select the frame layer
Add a d/s
♥
Open APFR_Element_11
C/P into your image
Resize 40%
Position to the bottom left of your image (see mine for placement)
Add a d/s
♥
Open APFR_Element_20
C/P as a new layer
Resize 30%
Position to the bottom right of your frame
Add a d/s
♥
Open APFR_Element_22
C/P into your image.
Resize 30%
Position over the leaves
Add a d/s
♥
Add your tube
Resize if needed and add a d/s
Positon near the pile of books
♥
Open APFR_Element_3
C/P into your image
Resize 20%
Position on top of the pile of books
Add a d/s
♥
Open APFR_Element_14
C/P into your image
Resize 20%
Position near your tube
Add a d/s
♥
Open APFR_Element_16
C/P into your image
Resize 30%
Position near to the coffee cup
Add a d/s
♥
Open APFR_Element_13
C/P into your image
Resize 30%
Position next to the book
Add a d/s
♥
Open APFR_Element_17
C/P into your image
Resize 60%
Position to the bottom of your image
Add a d/s
♥
Resize your tag now if you need to
Add copyrights and your name
Save as PNG
Please do not rip or claim as your own.
If you wish to show me your results please email me here
Sunday, 21 October 2018

-: Supplies Needed :-
Scrapkit - Winter Romance by Crys. You can purchase it HERE
Mask - Miz_Mask_100 http://mizteequesmasks.blogspot.com
Tube - Trinita http://picsfordesign.com
❆
Info
C/P + Copy and paste
Resize (click image - resize)
Add D/S = Add drop shadow
❆
Lets get started
↓
Open your mask and minimise for now
❆
Open a new transparent image 800 X 800 pixels
(don't worry you can resize at the end if you want)
❆
Selections - select all
Open WR_Paper_6
C/P into selection (right click, choose paste into selection)
Select none
Layers - new mask layer - choose mask from drop down layer
Layers - merge - merge group
❆
Open a new transparant layer
Open WR_Frame_5
Using your selection tool draw round the frame
Select the transparant layer you just made
Open WR_Paper_8
C/P into selection
Keep selected
❆
Open WR_Element_2
C/P as a new layer
Position to the right of your frame
Selections - invert
Hit delete to remove any overhanging tree.
Open WR_Element_1
C/P as a new layer.
Position to the top of your frame showing as many icicles as you like
Hit delete
Open WR_Element_40
C/P as a new layer
Position down the bottom of your frame
Hit delete
Selections - select none.
Add a drop shadow to all those layers finishing up on the window frame.
❆
Open WR_Element_5
C/P as a new layer
Resize 30%
Image - flip
Position to the top left of your frame
Layer - duplicate
Image - mirror
Layers - merge down
Add a d/s
❆
Open WR_Element_3
C/P as a new layer
Resize 60%
Position in the middle of your frame.
Add a d/s
❆
Open WR_Element_28
C/P as a new layer
Resize 60%
Position to the left of your frame
Add a d/s
❆
Open WR_Element_58
C/p as a new layer
Resize 40%
Positon to the bottom of your frame
Add a d/s
❆
Open WR_Element_12
C/P as a new layer
Resize 60%
Position to the left of your frame
Add a d/s
❆
Open WR_Element_13
C/P as a new layer
Resize 60%
Position to the right of the bottle
Add a d/s
❆
Open WR_Element_11
C/P as a new layer
Resize 60%
Position to the right of the flower
Add a d/s
❆
Open WR_Element_23
C/P as a new layer
Position to the bottom of the frame
Add a d/s
❆
Add your tube
Resize if needed
Position to the right of your frame
Add a d/s
❆
Open WR_Element_53
C/P as a new layer
Resize 60%
Position by your tube
Add a d/s
❆
Open WR_Element_29
C/P as a new layer
Resize 30%
Position near your tube.
Add a d/s
❆
Open WR_Element_50
C/P as a new layer
Resize 20%
Position near the other bauble.
Add a d/s
❆
Open WR_Element_30
C/P as a new layer
Resize 40%
Position to the right of your image.
Add a d/s
❆
Resize your tag if you wish now
Add all copyrights and your name
Save as PNG
Tutorial written on 21/10/2018 by Emma
Please do not rip or claim as your own.
If you wish to show me your results please email me here
Subscribe to:
Posts
(Atom)